Installation Guide Dormer Cap
Roof Shields are a revolutionary new product designed to stop and prevent valley leaks while enhancing the beauty of metal roof systems. Recommended for all Metal Roof Systems, Open Valley Shingle Roof Systems, and Cedar Shakes. Roof Shields are warranted 20 years against damaging UV rays.
The ''Permanent Prevention'' of Leaks where Primary & Secondary Roofs Intersect with Valleys

For use with Metal and Open Valley Roof Systems
Measure from the centerline of the left side valley, straight across the secondary roof to the centerline of the right side valley.
The ROOF SHIELDTM gasket throat width must EQUAL or EXCEED the measured distance.
Note: From the roof intersection point, move 4'' out the secondary roof ridge line to establish the correct location to measure the gasket throat width requirement.
|
Roof Shield Installation Guide - All Metal and Open Valley Shingle Roofs Roof Shields work with standard Valley Flashing but W-Valley style flashings are recommended for the best overall Roof System. To properly install a Valley Cap the W-Valley Flashing must be notched and installed as shown on this instruction sheet. Roof Shields not only provide a permanent seal, but they are easy to install saving time and money. |
|||
 |
 |
 |
 |
|
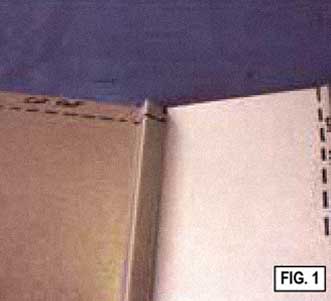
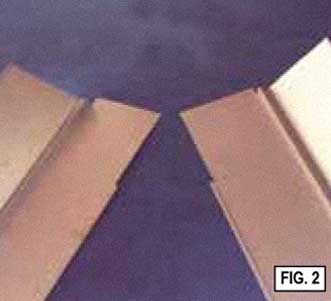
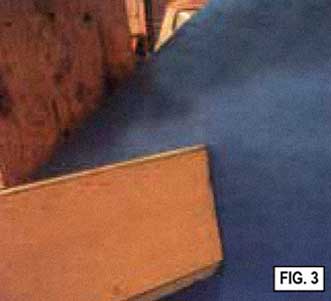
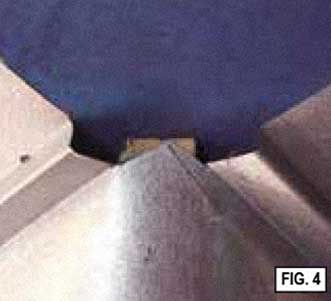
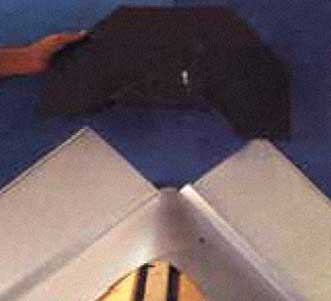
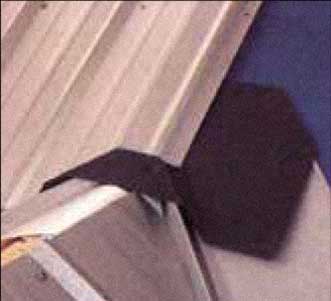
Step 1. Notch the Valley Flashing as shown in Fig 1. The second Valley Flashing must be notched as a mirror image of the first (see Fig 2). Note the Line Up Points (Fig 2) are to be used for correct placement of the Valley Flashing at the Primary and Secondary Roof Intersection (see Fig. 3 and Fig. 4). |
|||
 |
 |
 |
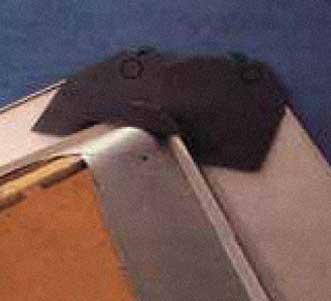 |
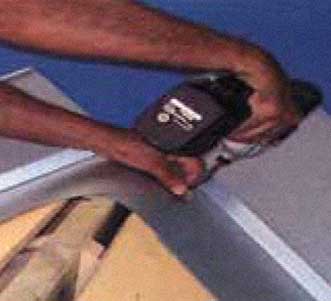
Step 2. Place THE FIRST VALLEY FLASHING THEN FOLD THE flap over the secondary Roof Ridge and fasten. Install second valley flashing in the same manner and fasten. Check line up points (fig 2) for correct placement (fig 4) |
Step 3. Place fasteners under shingles or panels. Note: on a 4-12 pitch roofs and below, or in severe weather and high wind areas, plug front openings with butyl or neutral cure silicone. |
||
 |
 |
 |
|
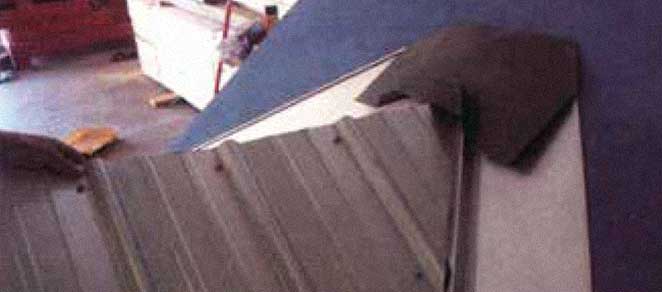
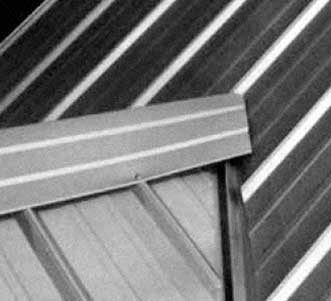
Step 4. Install Secondary roof. |
Step 5. Install Primary Roof Panels. INSTALL RIDGE CAPS. |
||